Unlock the Secret to Unforgettable Homemade Chocolate Ice Cream
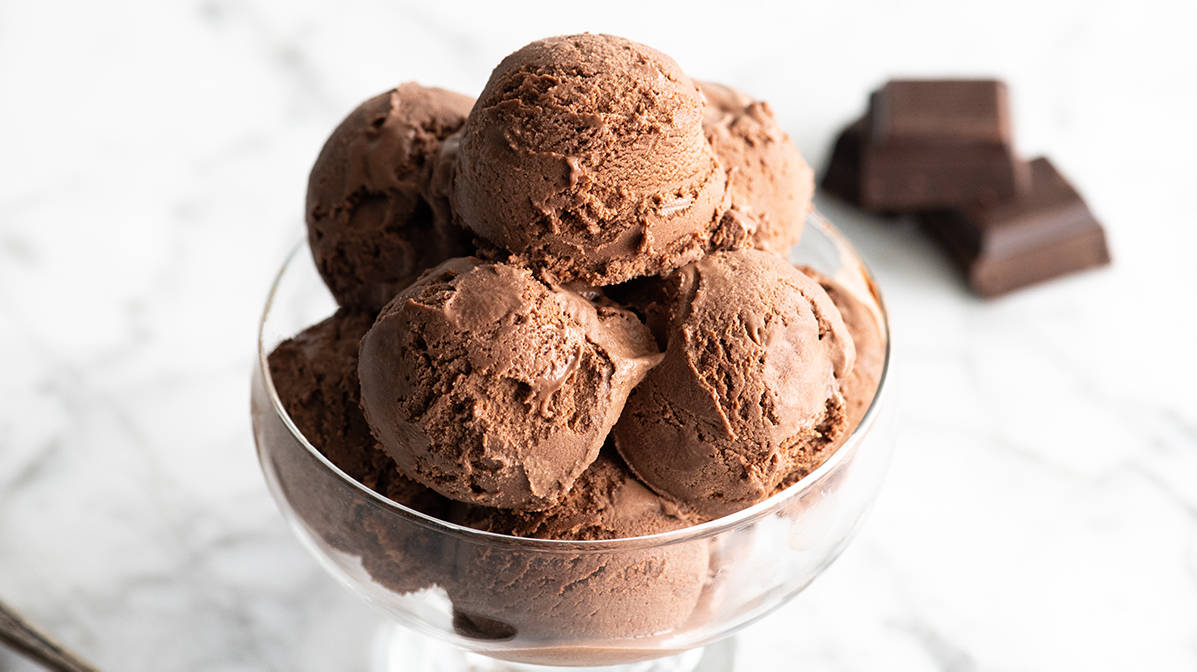
Imagine a scoop of intensely rich, utterly creamy chocolate ice cream that melts slowly on your tongue, delivering a profound cocoa experience with every bite. Now, imagine achieving that same luxurious, shop-quality indulgence right in your own kitchen. This isn't just a dream; it's the delicious reality of homemade chocolate ice cream, and it’s surprisingly easy to master. There’s an undeniable magic in crafting your own frozen treats, a satisfaction that store-bought simply can't match. The process is a joy, and the reward is a dessert that's not only fresh and pure but also bursting with a depth of flavor you control.
Our journey to the best homemade chocolate ice cream focuses on achieving that coveted ultra-creamy texture and a deep, complex chocolate flavor that isn't overly sweet. The secret lies in a meticulous yet straightforward approach, utilizing high-quality ingredients, including two forms of chocolate for maximum impact, and a classic custard base. Forget grainy textures or bland flavors; this recipe promises a velvety smooth, fudgy experience that will have you rethinking your favorite ice cream parlor.
Mastering the Magnificent Seven: Essential Ingredients for Perfect Chocolate Ice Cream
The foundation of any exceptional dessert lies in its ingredients. For truly shop-quality homemade chocolate ice cream, a select group of seven components works in harmony to deliver unparalleled richness and creaminess. Each plays a critical role, contributing to the final texture and an intensely satisfying chocolate flavor profile.
- Heavy Cream: This is arguably the most crucial ingredient for creaminess. Its high-fat content is non-negotiable, providing the luscious, rich mouthfeel that prevents ice crystals from forming and ensures that velvety texture. There simply isn't an adequate substitute if you're aiming for that premium ice cream shop quality.
- Cocoa Powder: The first form of chocolate, cocoa powder infuses your base with a foundational, deep cocoa flavor. For an even more intense, darker chocolate experience, consider using dark cocoa powder, often Dutch-processed, which has a less acidic, more mellow flavor.
- Semisweet Chocolate: The second chocolate powerhouse, chopped semisweet chocolate (around 60% cacao) melts into the warm cream, adding another layer of rich, authentic chocolate flavor and contributing to the ice cream's fudgy consistency. While you can adjust the percentage based on your preference—milk chocolate will yield a sweeter result, darker chocolate a more intense one—60% strikes a beautiful balance.
- Whole Milk: Providing the liquid base for our custard, whole milk contributes to the overall richness. While half-and-half can be an acceptable substitute, using whole milk helps maintain a fuller body and creamier texture.
- Granulated Sugar: Beyond sweetness, sugar plays a vital role in the texture of ice cream. It helps lower the freezing point, contributing to a softer, more scoopable consistency. Organic cane sugar or regular white sugar works perfectly here; there's no real substitute for its specific properties in this recipe.
- Egg Yolks: These golden gems are the unsung heroes of a truly creamy, decadent chocolate ice cream. Egg yolks are essential for creating a rich custard base, acting as an emulsifier that binds fats and liquids, leading to an incredibly smooth texture and preventing the formation of large, undesirable ice crystals. Do not omit them; they are critical to achieving that silky, store-bought feel.
- Vanilla Extract: A touch of vanilla doesn't just add its own delightful aroma; it enhances and rounds out the chocolate flavor, making it taste even more profound and complex. For an elevated experience, consider using vanilla bean paste or the seeds from a fresh vanilla bean.
Choosing high-quality versions of each of these ingredients will undoubtedly elevate your final product. For an even deeper dive into how each of these components contributes to the ultimate scoop, you might find our article on the Secret to Ultra-Creamy Chocolate Ice Cream: 7 Essential Ingredients incredibly insightful.
Crafting Your Custard Base: A Step-by-Step Guide to Silky Smoothness
The journey to phenomenal homemade chocolate ice cream hinges on perfecting its two-part base: the chocolate-infused cream and the silky egg custard. While it involves a few steps, the process is incredibly rewarding and ensures a truly luxurious texture.
Building the Chocolate Cream Foundation
Begin by whisking together the heavy cream and cocoa powder in a saucepan. This initial whisking helps to thoroughly incorporate the cocoa, preventing lumps later on. Bring this mixture to a gentle boil over medium heat, then reduce the heat and simmer for about 30 seconds, whisking constantly. This brief simmering step helps to "bloom" the cocoa powder, intensifying its flavor. Remove the saucepan from the heat and immediately add your chopped semisweet chocolate. Whisk diligently until the chocolate is completely melted and the mixture is smooth and glossy. Finally, stir in any remaining heavy cream to bring the mixture to the right consistency and temperature for the next stage. Transfer this rich chocolate cream to a large bowl and set a fine mesh strainer over it – this strainer is your secret weapon for a perfectly smooth final product.
The Art of Tempering Eggs for a Perfect Custard
Next comes the custard, where the magic of the egg yolks truly shines. In a separate medium bowl, whisk your egg yolks until they are light yellow and slightly frothy. In another saucepan, whisk together the whole milk, granulated sugar, and a pinch of sea salt over medium heat until the sugar dissolves and the mixture is slightly warm but not boiling.
Now, for the critical step: tempering the eggs. This technique prevents the egg yolks from scrambling when introduced to the warm milk. Slowly, gradually, and continuously whisking, ladle about ½ cup of the warm milk mixture into your beaten egg yolks. This gently raises the temperature of the yolks without cooking them. Once combined, slowly pour the tempered egg-and-milk mixture back into the saucepan with the remaining warm milk, whisking constantly as you pour. Continue to cook this custard over medium heat, stirring frequently with a spatula or whisk, until it thickens slightly and coats the back of a spoon. It should reach about 170-175°F (77-79°C). Do not let it boil.
Combining and Chilling for Optimal Flavor
Once your custard is ready, immediately pour it through the fine mesh strainer you positioned over your chocolate cream base. This crucial step catches any tiny bits of cooked egg or undissolved cocoa, ensuring your chocolate ice cream base is impeccably smooth. Whisk the two components together until thoroughly combined. The rich chocolate cream and the silky custard now form a single, decadent base.
Now for patience: cover the bowl with plastic wrap, ensuring the wrap touches the surface of the mixture to prevent a skin from forming. Refrigerate the base for at least 4-6 hours, or ideally, overnight. This chilling period is vital; it allows the flavors to meld and deepen, and ensures the mixture is cold enough for proper churning, leading to a much creamier final product. For a deeper dive into the exact ratios and methodology, our The Best Easy Homemade Chocolate Ice Cream Recipe Revealed article provides comprehensive detail.
The Art of Churning and Freezing: Achieving Shop-Quality Texture
Once your perfectly chilled base is ready, it's time for the final transformative steps: churning and freezing. These processes are what turn a liquid base into that irresistibly creamy, scoopable chocolate ice cream.
The Churning Process
Before you begin, ensure your ice cream maker's bowl is thoroughly frozen (typically 12-24 hours prior). Pour your well-chilled chocolate ice cream base into the frozen bowl of your ice cream maker. Follow your manufacturer's instructions for churning, which usually takes between 20-30 minutes. During this time, the machine continuously stirs the mixture, slowly incorporating air while simultaneously freezing it. This constant movement is key to preventing large ice crystals from forming, which would result in a grainy texture. Instead, it creates a multitude of tiny ice crystals, yielding a smooth, soft-serve consistency. The ice cream will be soft and pliable at this stage, much like a thick milkshake or soft-serve.
Freezing for the Perfect Scoop
Once churning is complete, transfer the soft chocolate ice cream into an airtight container. Press plastic wrap directly onto the surface of the ice cream to minimize air exposure, then seal the container with a lid. Place it in the coldest part of your freezer for a minimum of 4-6 hours, though overnight is ideal for the best firm-but-scoopable texture. This "ripening" period allows the ice cream to harden further and its flavors to fully develop.
Troubleshooting Tips:
- Too Many Ice Crystals? This can be due to insufficient fat (don't skimp on heavy cream or egg yolks!), too much water, or improper churning/freezing. Ensure your base is thoroughly chilled before churning, and churn until it reaches a thick soft-serve consistency.
- Too Hard to Scoop? This often means it's been frozen for too long, or there wasn't enough sugar in the recipe (which helps lower the freezing point). Let it sit at room temperature for 5-10 minutes before scooping.
- Grainy Texture? Ensure you properly strain your custard base to remove any cooked egg bits.
With proper technique, you'll be rewarded with a rich, dense, and perfectly scoopable homemade chocolate ice cream that rivals any specialty shop.
Beyond the Scoop: Creative Ways to Enjoy Your Homemade Chocolate Ice Cream
While a simple scoop of homemade chocolate ice cream is a sublime experience on its own, its versatility allows for endless culinary creativity. Elevate your dessert game with these delightful serving suggestions:
- Classic Companions: Serve it alongside a warm slice of your favorite chocolate cake, a fudgy brownie, or a giant chocolate chip cookie. The contrast between the warm baked good and the cold, creamy ice cream is pure bliss.
- Ultimate Sundaes: Build an epic sundae! Drizzle with hot fudge or caramel sauce, crown with a mound of whipped cream, sprinkle with chopped nuts, and don't forget the cherry on top.
- Decadent Milkshakes: Blend your homemade chocolate ice cream with a splash of milk and perhaps an extra tablespoon of cocoa powder for an incredibly rich and satisfying milkshake. Add a banana for a chocolate-banana twist.
- Affogato Indulgence: For coffee lovers, a scoop of this intensely flavored chocolate ice cream makes an exquisite affogato. Simply pour a shot of hot, freshly brewed espresso over it and watch it melt into a luxurious, bitter-sweet symphony.
- Ice Cream Sandwiches: Sandwich generous scoops between two soft, chewy cookies (oatmeal, peanut butter, or more chocolate chip!) for a truly gourmet ice cream sandwich.
- Aromatic Pairings: Experiment with a sprinkle of sea salt flakes, a dusting of cinnamon, or a hint of cayenne pepper for an intriguing spicy chocolate kick.
However you choose to enjoy it, your homemade chocolate ice cream is guaranteed to be a showstopper, a testament to the simple pleasure of crafting something extraordinary from scratch.
Making your own chocolate ice cream is more than just following a recipe; it's an experience that yields profound satisfaction and a truly superior dessert. By understanding the role of each ingredient—from the non-negotiable richness of heavy cream and egg yolks to the deep flavor imparted by dual chocolates—and by mastering the art of tempering and churning, you unlock a world of velvety indulgence. The result is an ultra-creamy, intensely chocolatey scoop that easily rivals, if not surpasses, your favorite ice cream shop. So, gather your ingredients, embrace the process, and prepare to delight your senses with the unparalleled richness of homemade chocolate ice cream. Your taste buds, and your guests, will thank you.
