The Best Easy Homemade Chocolate Ice Cream Recipe Revealed: Your Path to Frozen Perfection
Imagine a scoop of ice cream so rich, so velvety smooth, and bursting with an intense chocolate flavor that it transports you straight to your favorite gourmet parlor. Now, imagine achieving that same level of decadent indulgence right in your own kitchen. Sounds like a dream, doesn't it? Well, it's not! We're here to reveal the ultimate recipe for the best easy homemade chocolate ice cream that promises unparalleled richness and a creamy texture that will make you wonder why you ever bought it from a store. This isn't just any recipe; it's a meticulously crafted guide designed to deliver an irresistibly deep chocolate experience, made simpler than you might think. Making ice cream at home is more than just a culinary task; it's a delightful process that yields delicious rewards. There's a unique satisfaction in transforming a few simple ingredients into a frozen masterpiece. Our recipe leverages the power of two distinct forms of chocolate to create a complex, profound flavor that's perfectly balanced—not overly sweet, but deeply satisfying. Get ready to embark on a journey that culminates in truly unforgettable chocolate ice cream.Why Settle for Store-Bought When Perfection Awaits? The Homemade Advantage
The allure of homemade desserts lies in their freshness, the ability to control every ingredient, and the sheer joy of creation. When it comes to chocolate ice cream, this advantage is even more pronounced. Store-bought versions, while convenient, often contain stabilizers, artificial flavors, and excessive sugar that can detract from the pure, unadulterated taste of chocolate. By making your own, you're not just preparing a dessert; you're crafting an experience. You choose the quality of your chocolate, the richness of your cream, and the depth of your vanilla. The result is a frozen treat that far surpasses anything you'll find in the freezer aisle. It's a fun project, especially for families, and the taste? Simply divine. This recipe delivers a depth of flavor and an ultra-creamy texture that rivals, and often surpasses, even the most acclaimed ice cream shops. It’s the kind of dessert that makes ordinary moments feel extraordinary, perfect for serving alongside a warm slice of chocolate cake, a gooey giant cookie, or simply enjoying by the spoonful all on its own.Unlocking the Secret to Ultra-Creamy Chocolate Ice Cream: Key Ingredients
Achieving that coveted ultra-creamy texture and profound chocolate flavor hinges on a precise combination of high-quality ingredients. Our recipe calls for just seven essential items, each playing a crucial role in the final product. Understanding their function is key to mastering this exceptional chocolate ice cream.- Heavy Cream: This is the superstar for creaminess. There’s truly no adequate substitute for heavy cream if you desire that rich, luscious mouthfeel. Its high-fat content is what prevents ice crystals from forming, ensuring a silky-smooth texture.
- Cocoa Powder: One of our two forms of chocolate, cocoa powder provides a foundational bitterness and deep color. For an even more intense, dark chocolate ice cream experience, consider using dark cocoa powder.
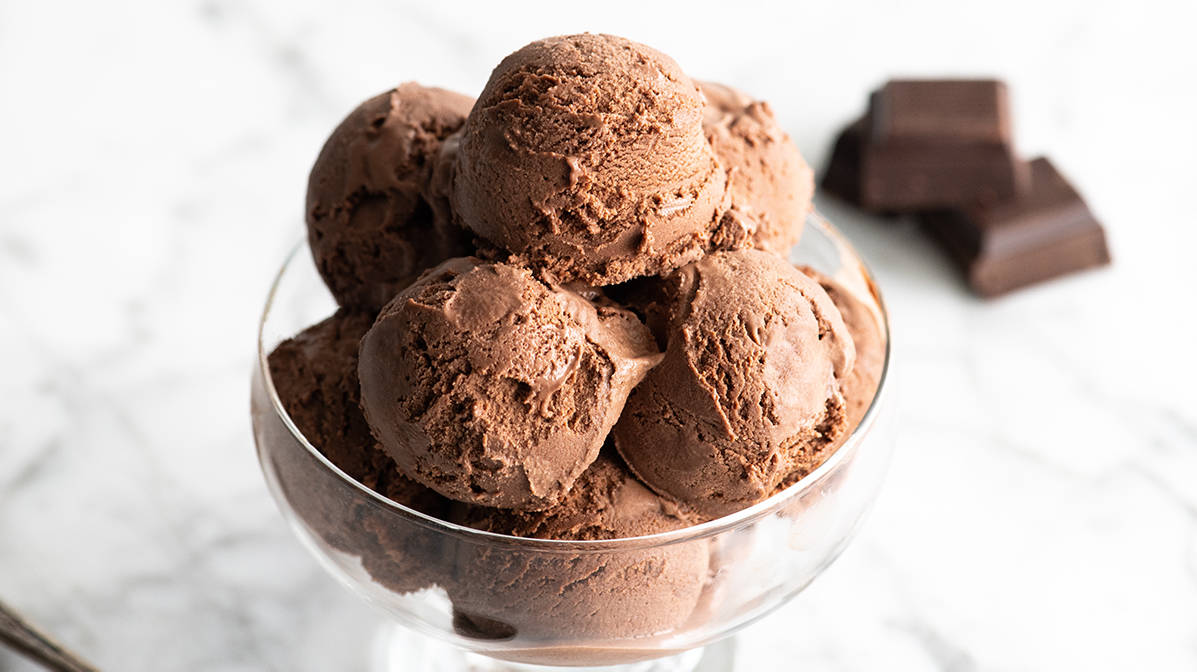
- Semisweet Chocolate: The second form of chocolate, typically 60% dark chocolate chips are recommended, but your preference matters. Using a darker chocolate will yield a more intense, less sweet flavor, while milk chocolate will result in a sweeter, milder ice cream. Experiment to find your perfect balance!
- Whole Milk: While whole milk contributes to the overall liquid content and richness, half-and-half can be an acceptable substitute if you're looking to slightly reduce the fat content without compromising too much on texture.
- Granulated Sugar: Essential for sweetness, of course, but also plays a role in the texture by lowering the freezing point of the mixture, contributing to a softer scoop. Regular white sugar or organic cane sugar works perfectly here.
- Egg Yolks: A critical, non-negotiable ingredient! Egg yolks are the secret to the ice cream’s luxurious custard base, adding incredible richness and contributing significantly to its ultra-creamy texture by emulsifying fats and preventing ice crystal formation. Do not skip these.
- Vanilla Extract: A touch of vanilla enhances and deepens the chocolate flavor. For an even more gourmet touch, consider using vanilla bean paste or the seeds from a fresh vanilla bean.
For more detailed insights into why these ingredients are so vital and how they work together to create magic, explore our in-depth guide: Secret to Ultra-Creamy Chocolate Ice Cream: 7 Essential Ingredients.
Your Step-by-Step Journey to the Best Homemade Chocolate Ice Cream
While making this decadent chocolate ice cream involves a few distinct steps—plus some crucial chilling and freezing time—the process is incredibly rewarding and well worth the effort. Let's walk through it together.Creating the Rich Chocolate Base
Begin by setting the stage for deep chocolate flavor. In a medium saucepan, whisk together about two cups of your heavy cream with the cocoa powder until thoroughly combined. This initial whisking helps to prevent lumps. Bring this mixture to a gentle boil over medium heat, whisking constantly for about 30 seconds. This step blooms the cocoa powder, intensifying its flavor. Immediately remove the saucepan from the heat.
Now, add your chopped semisweet chocolate to the hot cream mixture. Let it sit for a minute to begin melting, then whisk vigorously until the chocolate is completely smooth and fully incorporated. This creates a glossy, intensely chocolatey paste. Finally, whisk in the remaining heavy cream. Transfer this rich chocolate mixture to a large bowl and position a fine mesh strainer over it. This strainer is absolutely critical for later, ensuring your custard base is silky smooth.
Mastering the Velvety Custard
The custard component is what gives this chocolate ice cream its signature velvety texture and richness. In a separate medium bowl, whisk your egg yolks until they are light yellow and slightly frothy. Set aside.
In a clean saucepan, combine the whole milk, granulated sugar, and a pinch of sea salt. Heat this mixture over medium heat, whisking occasionally, until the sugar is dissolved and the milk is warm to the touch (but not boiling). This is where tempering comes in: to prevent the egg yolks from scrambling when added to the warm milk, we gradually introduce them to the heat. Slowly ladle about ½ cup of the warm milk mixture into your whisked egg yolks, whisking constantly and vigorously as you pour. This slowly raises the temperature of the egg yolks.
Once tempered, carefully pour the egg yolk mixture back into the saucepan with the remaining warm milk, whisking continuously as you add it. Continue to cook the custard over medium heat, stirring constantly with a rubber spatula or wooden spoon, until the mixture thickens enough to coat the back of your spoon (this is known as the "nappe" stage). This typically takes about 5-8 minutes, but be careful not to let it boil, or the eggs may scramble. Once thickened, immediately remove from heat and pour the hot custard through the fine mesh strainer you positioned earlier, directly into your bowl with the chocolate base. Whisk everything together until perfectly combined. The strainer will catch any tiny bits of cooked egg or undissolved chocolate, ensuring a flawlessly smooth base.
The Essential Chill
This step is non-negotiable for superior chocolate ice cream. Once your base is fully mixed, cover the bowl with plastic wrap, pressing it directly onto the surface of the mixture to prevent a skin from forming. Refrigerate the base for at least 4-6 hours, or ideally, overnight. A thoroughly chilled base is crucial for achieving the perfect consistency during churning and preventing an icy texture. The colder your base, the better your ice cream will be.
Churning to Perfection
Once your base is thoroughly chilled, it’s time to churn! Follow the manufacturer's instructions for your specific ice cream maker. Pour the chilled chocolate ice cream base into the frozen canister or bowl of your ice cream machine and churn for 20-30 minutes, or until it reaches the consistency of soft-serve ice cream. The churning process incorporates air, giving the ice cream its light, creamy texture, and freezes it simultaneously.
The Final Freeze (Ripening)
Transfer the freshly churned, soft ice cream into an airtight container. Press plastic wrap directly onto the surface of the ice cream to prevent freezer burn and the formation of ice crystals. Freeze for an additional 2-4 hours to allow the ice cream to "ripen" and firm up to a scoopable consistency. This final freeze time is what transforms soft-serve into firm, ready-to-scoop ice cream.
Expert Tips for Your Dreamiest Chocolate Ice Cream Ever
- Prep Your Tools: Ensure your ice cream maker bowl (if it's a freezer-bowl type) is completely frozen – ideally for 24 hours. A well-frozen bowl is paramount for efficient churning.
- Don't Rush the Chill: We can't stress this enough. An adequately chilled base (4-6 hours minimum, overnight is best) is the biggest factor in preventing icy, grainy ice cream.
- Quality Ingredients Make a Difference: While any good quality chocolate will work, opting for a high-quality cocoa powder and baking chocolate will significantly elevate the flavor profile of your chocolate ice cream.
- A Pinch of Salt: Don't underestimate the role of a tiny pinch of sea salt in the custard. It doesn't make the ice cream salty; rather, it amplifies and balances the sweetness and deepens the chocolate flavor.
- Consider Espresso Powder: For an even richer, darker chocolate flavor without tasting like coffee, add ½ teaspoon of instant espresso powder along with your cocoa. It truly enhances the chocolate.
- Preventing Freezer Burn: Always press plastic wrap directly onto the surface of the ice cream before putting on the lid of your container. This creates an airtight seal that prevents ice crystals from forming on top.
